How To Make A Circular Color Gradient In Python? – Method One
To create a circular color gradient in Python, you can use the library matplotlib. Here is an example of how to do it:
import matplotlib.pyplot as plt
import numpy as np

# Create a figure and axis
fig, ax = plt.subplots(figsize=(5, 5))

# Define the center and radius of the circle
center = [0.5, 0.5]
radius = 0.5

# Create a colormap
cmap = plt.get_cmap("hsv")

# Create a meshgrid of points in the circle
theta, r = np.linspace(0, 2 * np.pi, 100), np.linspace(0, radius, 100)
theta, r = np.meshgrid(theta, r)

# Convert the polar coordinates to cartesian coordinates
x, y = r * np.cos(theta) + center[0], r * np.sin(theta) + center[1]

# Plot the color map
plt.scatter(x, y, c=r, cmap=cmap)

# Remove the axis
plt.axis("off")

# Show the plot
plt.show()
This code creates a figure and an axis, defines the center and radius of the circle, creates a colormap using the “hsv” colormap, creates a meshgrid of points in the circle, converts the polar coordinates to cartesian coordinates, plots the color map on the points, remove the axis and shows the plot.
You can adjust the center, radius and the colormap to change the circular gradient.
You can also use other libraries like OpenCV, PIL, etc., to create the circular gradient.
Hire Experienced and Proficient Python Developers
How To Make A Circular Color Gradient In Python? – Method Two
To create a circular color gradient in Python, you can use the ‘numpy’ and ‘matplotlib’ libraries. Here’s an example of how to create a circular color gradient using the ‘numpy’ and ‘matplotlib’ libraries:
import numpy as np
import matplotlib.pyplot as plt

# Create a blank image with a white background
img = np.ones((100, 100, 3))

# Define the center and radius of the circle
center = (50, 50)
radius = 50

# Create a circular mask
y, x = np.ogrid[:100, :100]
mask = (x - center[0])**2 + (y - center[1])**2 <= radius**2

# Define the colors for the gradient
colors = [(1, 0, 0), (1, 1, 0), (0, 1, 0), (0, 1, 1), (0, 0, 1), (1, 0, 1)]

# Create the gradient
for i in range(radius):
    color = colors[i % len(colors)]
    img[mask & (i**2 <= (x-center[0])**2 + (y-center[1])**2)] = color

# Plot the image
plt.imshow(img)
plt.show()
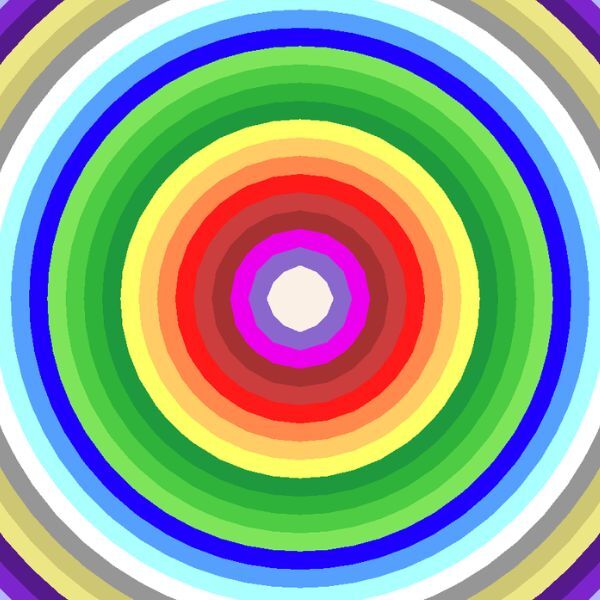
This will create a 100×100 image with a circular color gradient that goes through the colors red, yellow, green, cyan, blue, and magenta. The colors are defined in a list and the gradient goes through them in a loop.
You can adjust the size of the image, the center and radius of the circle, and the gradient colors to suit your needs.
You can also use other libraries like openCV or PIL to do this, and you can also use various techniques to create color gradients like interpolation or color map.
How To Make A Circular Color Gradient In Python? – Method Three
To create a circular color gradient in Python, you can use the ‘matplotlib’ library. Here is an example of how to create a circular color gradient using matplotlib’s CircularGradient class:
import matplotlib.pyplot as plt
from matplotlib.colors import LinearSegmentedColormap

# Create the color map
cmap = LinearSegmentedColormap.from_list("mycmap", [(0, "red"), (0.5, "green"), (1, "blue")])

# Create the figure and axes
fig, ax = plt.subplots(figsize=(5, 5))
ax.set_aspect("equal")

# Create the gradient and add it to the axes
ax.imshow(
    [[0, 1]],
    cmap=cmap,
    extent=(-1, 1, -1, 1),
    origin="lower",
    clip_on=False,
    alpha=1
)

# Remove the axis labels and ticks
ax.axis("off")

# Show the plot
plt.show()
The example above creates a color map with a gradient from red to green to blue. The gradient is applied to a 2×2 image and the resulting image is displayed in a figure. You can adjust the color, size, and position of the gradient by changing the parameters passed to the ‘imshow‘ function.
How to make a circular color gradient in python? Using ImageDraw.pieslice() method
To create a circular color gradient using the ‘ImageDraw.pieslice()‘ method in Python, you can use the PIL (Python Imaging Library) library. Here is an example of how to create a circular color gradient using the ‘PIL‘ library:
from PIL import Image, ImageDraw

# Create an image with a white background
im = Image.new("RGB", (200, 200), (255, 255, 255))

# Create a draw object
draw = ImageDraw.Draw(im)

# Define the starting and ending angles for the pie slice
start = 0
end = 90

# Define the color gradient
colors = [(255,0,0), (0,255,0), (0,0,255)]

# Draw the pie slice with the color gradient
for i, color in enumerate(colors):
    draw.pieslice([25, 25, 175, 175], start, end, fill=color, start=start, end=end)
    start += 90
    end += 90

# Show the image
im.show()
The example above creates an image with a white background and a draw object. Then it defines the starting and ending angles for the pie slice and the color gradient, which goes from red to green to blue. It then draws the pie slice with the color gradient and shows the image. You can adjust the color, size, and position of the gradient by changing the parameters passed to the pieslice function.
Note that you need to install PIL library, you can do it by running !pip install pillow in your command line.


 By
By January 25, 2023